How to use a protractor: choose the right scale
Centre on the vertex, baseline on one arm, then read from the matching zero. Practise with four angles that change direction, tilt and arm length.
Which number do you read?
A protractor may show 50 and 130 at the same mark. Choose the scale that starts at 0 on the arm you lined up with the baseline. Do not choose a row just because it is nearer the outside edge.
This guide uses a semicircular protractor for angles up to 180° and the smaller, marked angle between two arms. Reflex angles greater than 180° are outside this exercise. You will need a protractor, a ruler and the printable sheet for hands-on measurement. On screen, you can first estimate each angle and practise choosing the right scale.
Place, align, follow, check
- Estimate first. An acute angle is greater than 0° and less than 90°. A right angle is 90°. An obtuse angle is greater than 90° and less than 180°.
- Find the vertex: the point where the two arms meet. Put the protractor’s centre mark exactly on it.
- Rotate the protractor until its 0° baseline lies along one arm, with the curved scale over the marked angle. Use the printed baseline; a plastic edge may sit below it.
- Find the zero on that arm. Follow the same row of numbers around to the other arm. If an arm is too short, extend it straight with a ruler, keeping the vertex fixed.
- Read the scale where the other arm crosses it and add the degree sign. Check against your estimate: an acute opening cannot measure 130°.
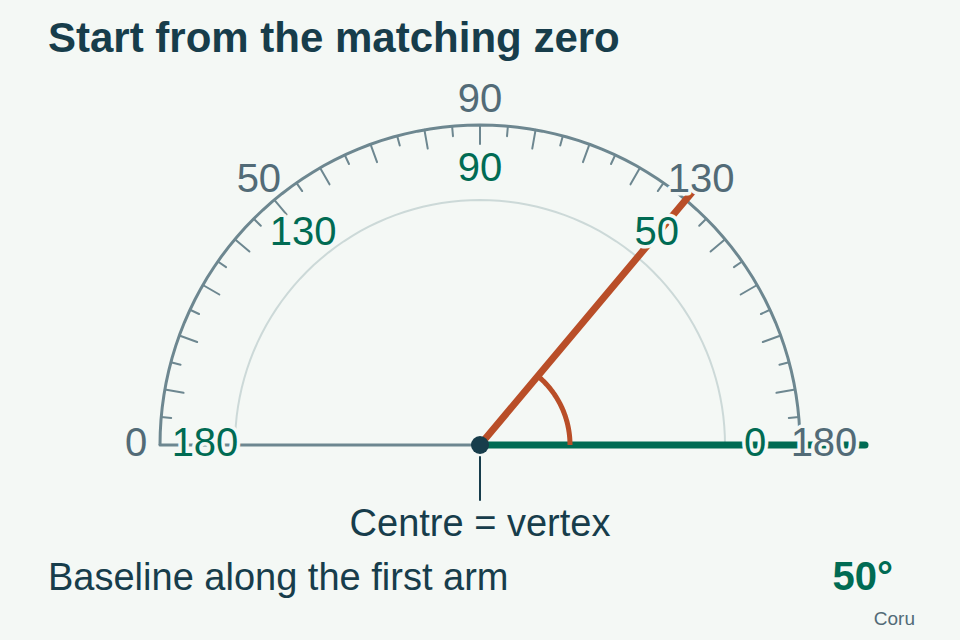
Worked example: 50° or 130°?
The first arm points right, so use the row whose right-hand number is 0. At the second arm, that row reads 50. The angle is therefore 50°, an acute angle. The other row reaches 130 because it starts from the left-hand zero.
If the first arm pointed left, you would start at the left-hand zero instead. “Always use the inner scale” is not a reliable instruction: find the matching zero each time.
Four angles to try
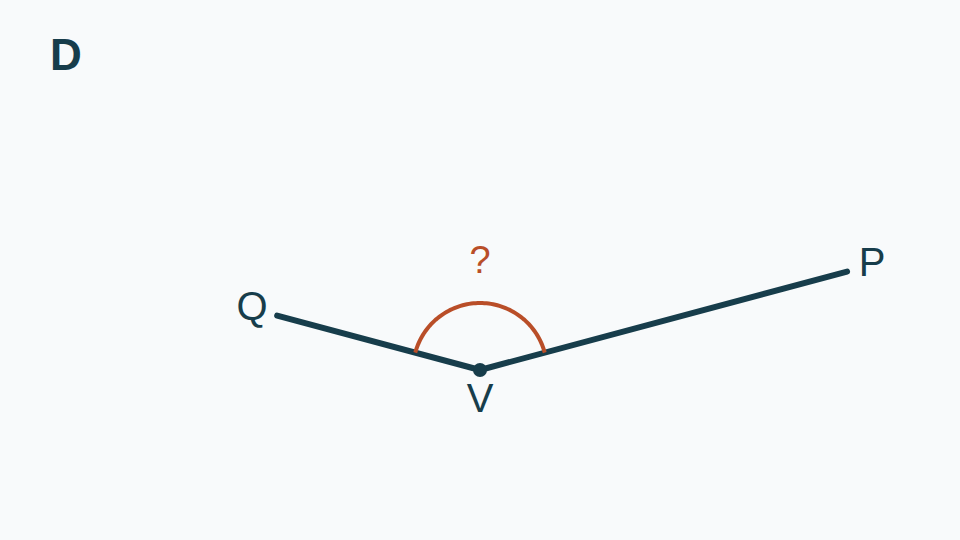
For each drawing, measure the opening marked by the small arc. V is the vertex. Start from arm VP and read toward arm VQ. Before measuring, write “acute” or “obtuse”, then record your measurement in degrees. The answers are below all four drawings.
Use the PDF for a paper exercise. Print without stretching the image: proportional fitting to the paper preserves angles. A phone image is useful for estimation, but holding a physical protractor on a small screen can make alignment awkward.
Printable worksheet: four angles and answers
Two A4 pages. Exercises on the first page; answers and checks on the second.
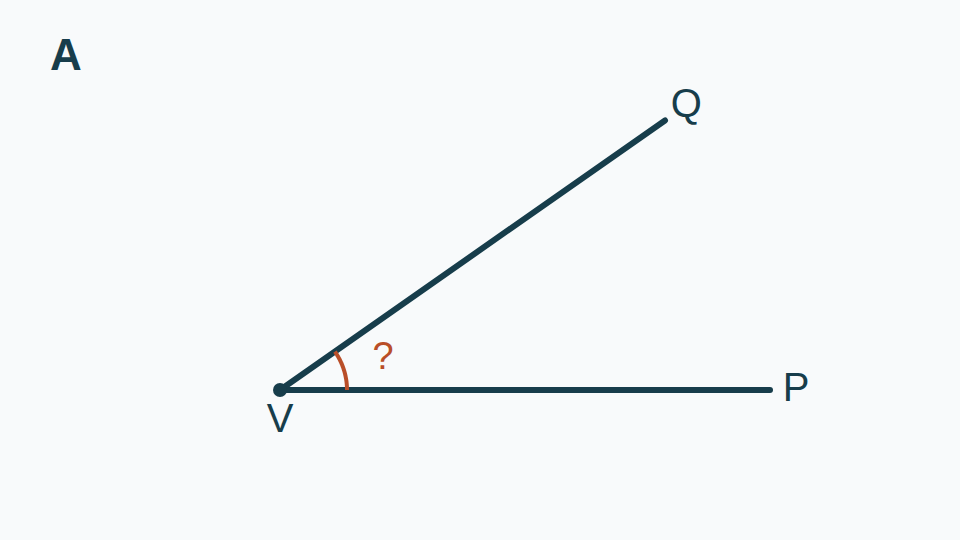
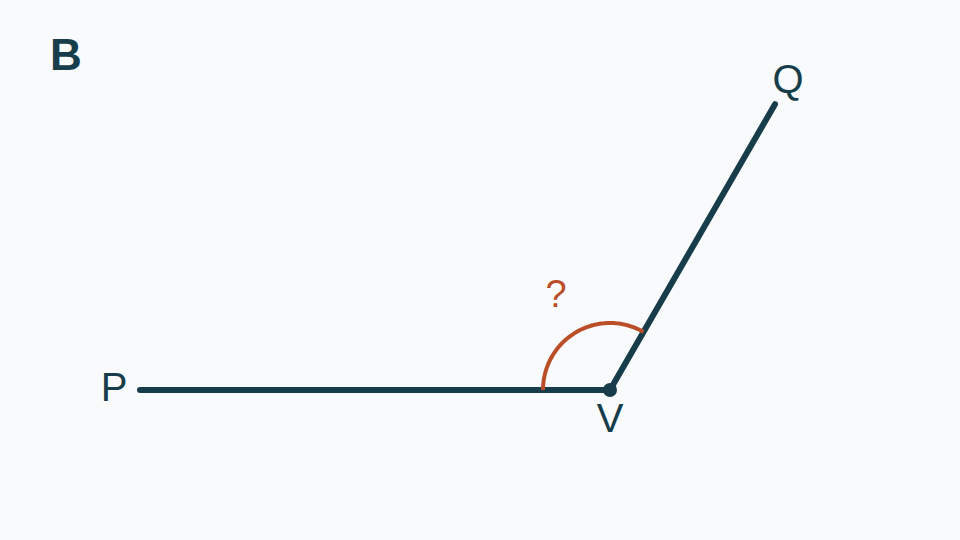
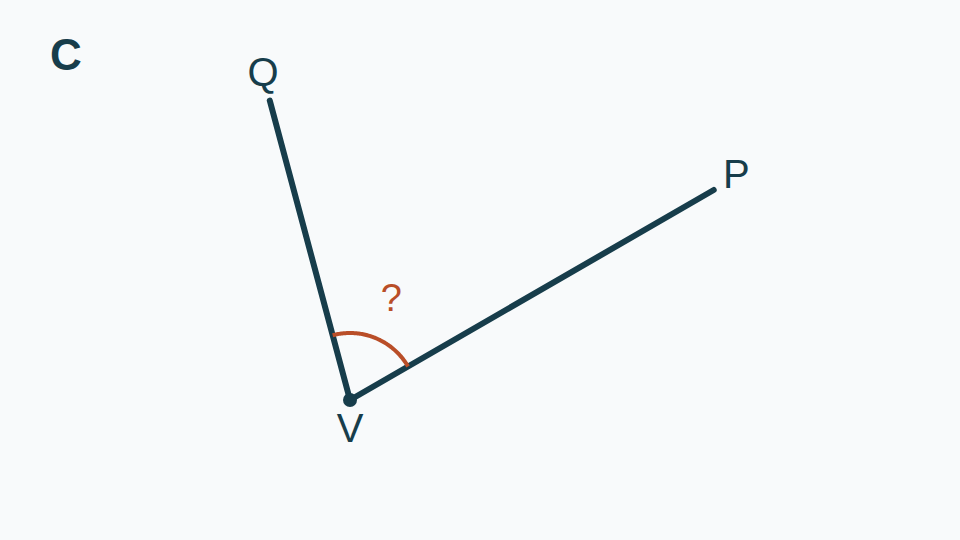
Answers: check the zero as well as the number
- A: 35°, acute. VP points right, so read from the right-hand zero. The other scale gives 145°, which contradicts the acute opening.
- B: 120°, obtuse. VP points left, so read from the left-hand zero. Choosing 60° would use the other scale.
- C: 75°, acute. Rotate the protractor to match VP before reading. A sloping baseline does not add extra degrees; the opening between the two arms is what you measure.
- D: 150°, obtuse. Align with VP, then read to VQ. The two arms have different drawn lengths, but length does not determine the angle. The competing reading, 30°, is acute.
If your result is different
Check placement before doing arithmetic. A centre mark beside the vertex, a baseline slightly off the first arm, or a switch between rows can each give a wrong reading. Start again from the vertex and the correct zero.
The drawings were constructed at the stated angles. A hand reading may vary slightly because of line thickness, printing and placement. If you are several degrees away, recheck alignment and measure again.
Try a check of your own
Draw a new angle of 65°. Mark the vertex, draw one arm, place the protractor, mark 65° from its matching zero, then join the vertex to that mark with a ruler. Rotate the paper and measure again. You should still read 65°.
Now lengthen just one arm along the same straight line. Measure again: changing the drawn length does not change the angle. If your reading changes, inspect the alignment rather than replacing the intended answer.
Where the method comes from
The Open University’s OpenLearn lessons explain centre and baseline placement, following the scale from its matching zero, extending short arms and checking an acute reading against 90°. Coru created the diagrams, four practice angles, printable sheet and explanations here.